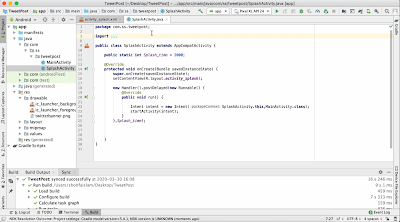
First of all, you need to create a New Empty Activity from the left side, click the app and press right button of your mouse then select "New"-->" Activity"-->"Empty Activity"
Then write your Activity name, I am giving SplashActivity as the activity name.then click on finish.
After finish sync your webview project it will automatically open activity_splash.xml and SplashActivity.java.
Now first we will design our Splash Screen layout in the activity_splash.xml file. We will show our company logo or company banner on the splash screen. So, first, we will copy that image then we will paste in our project in the drawable folder. For that first expand "res" folder from the left side then click on the drawable folder right-click on your mouse, then click on Paste.
It will show you two folder and ask you to choose where you want to paste, you should choose drawable, not to choose drawable-v24.
After that it shows you the name of your image, remember that your image name should not have space and also should not have the uppercase letter, image name should be all lowercase letter and don't have space. Example "twitterbanner.png"
In the activity_splash.xml file first we will write RelativeLayout instead of ConstraintLayout ,thrn we'll take an ImageView, in this imageview we will show our Banner or logo or any image. we will give "height = match_parent","width = match_parent","margin =15dp",id(i am giving id "splash").
Code:
So the whole code will be in activity_splash.xml is:
So, the final whole code will be in SplashActivity.java file is:
We have finished coding in the SplashActivity.java file for Webview App. now we will arrange our activity in the AndroidManifest.xml file. SplashActivity will be first performed before MainActivity. In conclusion, the whole code will be in the AndroidManifest.xml file.
We have finished writing all the code for Creating Splash Screen in Android Webview App. Now I will run my project on Emulator.
As you can see above picture my Splash Screen is working perfectly in Webview App. So we have successfully created our Splash Screen. Thanks.
Code:
After that, we will move to the SplashActivity.java file. First, we will store our splash time in a variable called Splash_time, we will take a global variable for efficiency in coding. and I will show my splash screen for 2000 milliseconds. However, you can increase or decrease this showing time as long as you want.
Code:
After that, I will call Handler().postDelayed function in oncreate method.
Code:
So, the final whole code will be in SplashActivity.java file is:
Code:
We have finished coding in the SplashActivity.java file for Webview App. now we will arrange our activity in the AndroidManifest.xml file. SplashActivity will be first performed before MainActivity. In conclusion, the whole code will be in the AndroidManifest.xml file.
Code:
We have finished writing all the code for Creating Splash Screen in Android Webview App. Now I will run my project on Emulator.
As you can see above picture my Splash Screen is working perfectly in Webview App. So we have successfully created our Splash Screen. Thanks.


No comments:
Post a Comment